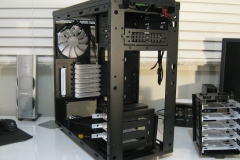
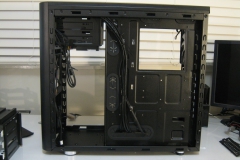
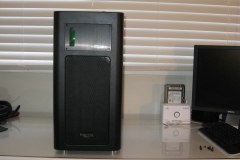
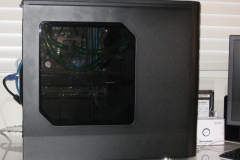
We make every effort to undertake a practical build inside any case that we review – it’s our belief that we don’t really fully appreciate the design and build quality unless we have actually built a rig in it and used it for a period of time. As fate would have it, we also needed to test out the XSPC Raystorm 750 EX240 water cooling kit and the Arc Midi R2 was the perfect candidate to house our first custom water loop setup.
Components
We used the following components in our Arc Midi R2 build.
-
-
-
- Intel i5 3570K (overclocked to 4.2 @ ~1.1v)
- Corsair Vengeance Low Profile Ram 2x4GB (Blue)
- Gigabyte G1.Sniper M3 Z77 mATX Motherboard
- Corsair CX-600M semi modular PSU
- Noctua NH-U14S (initially for testing)
- XSPC Raystorm 750 EX240 water kit (final build)
- SanDisk Extreme 120GB SSD
- Western Digital Blue 500GB 7200rpm mechanical HDD
- Gigabyte GeForce GTX580 stock cooled graphics card
- “only a few” black zip-ties for cable management
- 2x 5v 3-pin Fan speed reduction adapters
-
-
The NH-U14S was used to establish a baseline and component check only – with the XSPC water kit flagged for the final build.
Installation
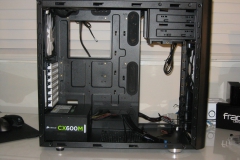
First we stripped down the whole case to get an idea of logistics like the order of assembly, obstructions and cable management.
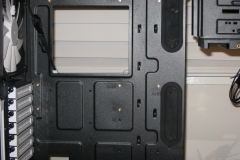
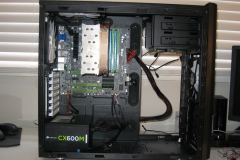
Once we had a rough plan, we dry fitted everything with a Noctua NH-U14S to check out the CPU cut out in the motherboard tray and look at clearance. Although we didn’t tidy up the cables for our “dry fit”, we could see that clearance wasn’t going to be a problem and installation of the motherboard, PSU and cooler was a breeze.
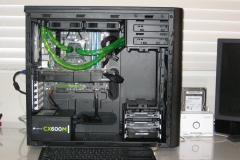
After establishing that all of our kit was working 100%, we went on to install the XSPC Raystorm 750 EX240 water kit. This is obviously a much more involved process than installing an air cooler and we found the case quite forgiving overall with a couple of minor quirks that we will note later.
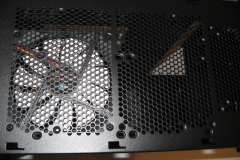
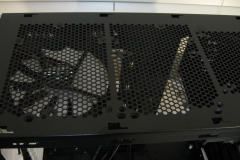
The radiator offset holes are great, you could fit a thicker radiator than our EX240 in the roof without fouling the motherboard RAM slots or heat sinks. The offset also means that the outer most (or front) line from the radiator should typically clear the top of the graphics card if you need to run it across to an internal pump or reservoir at the base of the case.
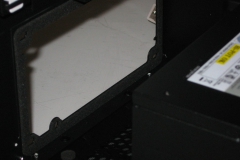
The padding around the PSU mount is perfectly placed and should help with any potential vibration from your power supply. The only thing to note here is that we needed to press our Corsair CX-600M in place to make sure that the screw holes lined up because of the padding but the screws all went in without issue and it felt pretty snug once installed.
Fractal Design include a thumbscrew socket-style bit with Philips head imprint at the top for installing the motherboard offsets. You can install them by hand or using a screw driver and it is always a bonus to see a tool like this in the case accessories bag.
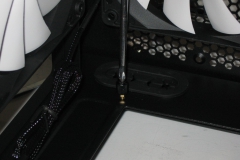
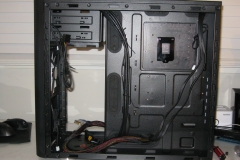
The grommets on the cable holes can take a fair bit of punishment and didn’t dislodge during our “dry fit” or “build proper” with final cable management/routing.
Given that we really didn’t need the middle drive cage, we simply removed it and put the thumbscrews that held it in place back in their holes to make sure we didn’t lose them. Although it was hard to tell, the 2 thumb screws that hold the middle drive cage in place looked slightly different to the others so we wanted to keep them separate just in case. The void that we created by removing that middle drive cage allowed the upper front 140mm fan to feed air into the case, feeding the GTX580 stock cooler. The bottom drive cage will hold up to three 3.5″ mechanical hard drives or three 2.5″ SSDs. When you combine that with the capability to mount two SSDs on the rear of the motherboard tray, Fractal Design still provide ample room for the average user’s data storage even if the middle cage is removed – these drive mounting options make the case really versatile.
Now for the quirks..
Quirk #1: Top panel and raised screw heads are not a good mix. The mounting screws that come with the XSPC EX240 radiator have 2-3mm high heads on them which, when fitted to the top panel can stop the top panel from sliding on as it should. The panel still slides on but if you are not careful, it may not sit flush on the edges. Standard case fan screws are fine and do not impede the fitting of the top panel at all. This isn’t a huge issue but is something to be aware of.
Quirk #2: 5.25 bay tolerance Our XSPC Dual bay reservoir and pump unit has a fill port in the top that sits about 1mm above the rest of the unit. This was easily managed by pressing into the upper inner lip of the drive bay with my thumbs to improve the clearance. This wasn’t an issue and as you can see in the photos, the reservoir does slide into place and screws in as it should. As stated in our XSPC Raystorm 750 EX240 review, this might have been due to the case, the reservoir or the combination of both.
Fan configuration in our water cooled build
The integrated 3 stage fan controller is powered from a Molex plug and has three 3-pin fan headers for the included 140mm fans. After checking the fan performance to noise ratio, we decided that the fans should be fine at 5v, especially with the middle drive cage removed.
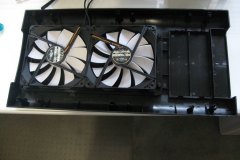
The XSPC 120mm fans on the radiator were a touch noisy at 12v and the water loop still performed really well with the radiator fans set to a barely audible 5 volts.
We still wanted to keep the flexibility of being able to easily and manually adjust the radiator fan speed so we hooked them up to the integrated fan controller along with the upper front 140mm fan with the intention of roughly matching the air intake from the front with the exhaust at the top. The rear and lower front 140mm fans were run from the motherboard fan headers via 5v fan reduction adaptors to provide constant and virtually silent airflow.
This might sound complicated but it was very simple to implement when the case has a subtle fan controller on the IO panel. If we had to use a 5.25″ bay mounted fan controller, it would have restricted our water cooling options to either internal tube or single 5.25″ bay reservoir.

