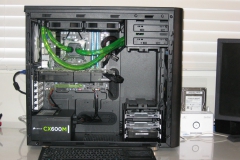
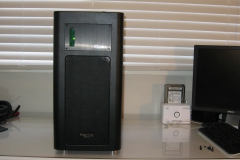
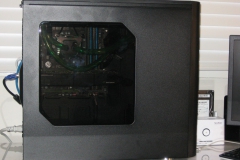
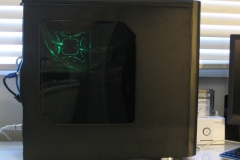
We recently combined reviews of the XSPC Raystorm 750 EX240 water kit and the Fractal Design Arc Midi R2 case on a green and black themed water cooling build. It seemed only fair that we also publish our build log as well to complete the project.![]()
If you are considering using either of the reviewed products or perhaps considering your first custom loop water cooling project, then we hope this article helps. In the end, our gaming PC came out as we had envisioned and although we had a couple of surprises along the way, the whole exercise was pretty straight forward.
This is what the water cooled Arc Midi R2 looked like when we were done, read on to see what was involved in getting there.
Tools
The standard tools of trade for us are:
- a small and medium Philips head screwdrivers with magnetic tips
- scissors for opening packaging
- zip ties
- big scissors for cutting the water tubing
- thermal paste (Noctua NT-H1)
- Isopropyl Alcohol and paper towel
- penlight
- Noctua screwdriver for the NH-U14S
- Ziplock bags and a small permanent marker
Components
- Intel i5-3570K (tested previously in our Node 304 test rig)
- Gigabyte G1.Sniper M3 Z77 m-ATX motherboard
- 2x4GB Corsair Low Profile DDR3 1600 RAM (previously tested in the Node 304)
- Corsair CX-600M Power Supply (from the Node 304)
- SanDisk Extreme 120GB SSD
- Seagate 750GB 7200rpm HDD (from another test build)
- Gigabyte Stock Cooled GTX580 Graphics card (taken from the test bench equipment set)
- Noctua NH-U14S CPU Cooler (for initial testing)
- XSPC Raystorm 750 EX240 water cooling kit
- XSPC LEDs in UV and Green XSPC Coolant in Green UV Noctua
- NF-F12 fans (for benchmarking on the radiator)
- 2x5v 3-Pin fan speed reduction adaptors
We liked the Gigabyte G1.Sniper M3 (Z77) motherboard because we were looking for a green and black theme, the board has some great features and it’s also an 1155 socket, which we needed for our i5 3570K. This motherboard also does SLI with a one slot gap on an m-ATX form factor. Finding it proved to be the biggest challenge and it would seem that we managed to get one of the last retail boards in the country.
The Corsair CX-600M was a clear favourite from our Node304 build and it wasn’t until after we installed it that we realised the green on the label matched well with our motherboard – pity you only see it when the side panel is off.
Our trusty GTX 580 still gives us some decent frames in our games and we wanted to give it a new home – don’t be surprised if we water cool that card somewhere down the track either.
SanDisk got another run with the SanDisk Extreme 120 SSD – we can’t fault their 120 or 240GB SSDs and at the time of acquiring parts, these were really good value for money. As usual, we pair our SSD with a 7200rpm drive for our Steam Library – in this build, it’s an older 750GB Seagate Barracuda.
General Approach
A build is usually smoother if you are familiar with the components before you start. It doesn’t take much time to have a quick look at any instructions and then check out the parts to make sure you have everything you need. One of the first things I generally do first is exclude the parts that I don’t need such as AMD CPU backplates if I’m doing an Intel build. In this build, I also set aside the parts required for mounting the Radiator externally as they were not required. All redundant parts went back in their boxes before we got underway. In terms of the instructions, I read the XSPC ones cover to cover first with this being my first water build but I knew the drill pretty well for the rest of the gear.
Most stores will allow 7 days to determine if a component is Dead on Arrival (DOA) – this means that you can usually return it for an immediate replacement. If you find a fault outside of the DOA period then the product typically goes back to the manufacturer for warranty return which takes longer. This build consisted of mostly pre-tested components with the biggest risk being a faulty motherboard. I took the approach of testing the motherboard inside the case with the plan of testing it outside the case should there be an issue – which there wasn’t.
XSPC advise that a 24 hour leak test is required so I worked my weekend around this test and basically planned for a Saturday night and Sunday to be leak testing time. The other parts of the build occurred in stages with breaks taken during the windows installation and Prime thermal test runs.
We have a build area almost 2 metres long, under a window which is great for natural light and not fantastic for taking photos but it’s out of the way and can be left safely unattended. It’s also a good idea to keep screws organised so you know what component they came from – ziplock bags can be handy for this, just write on the outside of them in permanent marker because screws often look the same and these days, they are all black.


