Fractal Design’s Define R4 case has been on the market for a few months now and we loved the R3 version so much we decided to run a build log with its replacement.
After a, uh hem, problem with my last motherboard I needed a new system, and quick. Some questions bounced around my head:, what case, CPU/Mobo combo, should I wait for Haswell, should I make a cuppa first?? So many questions, not enough time! We needed to keep in mind that the deceased was heavily used, not just for gaming but for day-to-day use by the household the decision was easily made and questions answered: buy Ivy Bridge and roll with a new case now. So the decision now came down to what case? Fractal’s R3 case was impressive; we thought we’d give the newer R4 a crack – the decision was an easy one.
We’ll take you through our build log and our experience with the R4: the highs, the lows and the in-betweens.
Rig Purpose
As mentioned, the new rig would be used for gaming (the usual suspects: Battlefield 3, Skyrim, Tomb Raider, Dead Space 3), word processing, graphic and video editing and of course: internet browsing. We have loose criteria: the incumbent case would need to be large enough to house GTX580 video and a large CPU cooler – in this this review we’re using the Noctua NH-D14. The case would need to be as quiet as possible, as inside will house some non-standard wind turbines so not to disturb users! Whilst we’re installing 3 hard drives, the expecation in the future is that we’d need more so a case with ample expansion is required. A DVD burner from the old rig is being recycled so we’ll throw that in for good measure. Again, the R4 fits the bill.
Phil went with white in his R3 build, we’re going Pearl Black to match, well .. everything we have already: monitors, keyboard/mouse and DVD Burner are black so the colour is suitable.
Continuity goof: the Noctua fan is already mounted!
Technical Specifications
The R4 boasts some impressive features and has a reputation for quality and practicality.
- ATX, Micro ATX, Mini ITX motherboard compatibility
- 7 + 1 expansion slots
- 2 – 5.25″ bays
- 8 – 3.5″ HDD trays – all compatible with SSDs, 2 – 2.5″ extra SSD positions
- 3 – ModuVent™ plates – two in the top and one in the side
- 7 – fan positions (2 Silent Series R2 fans included)
- Filtered fan slots in the front and bottom
- CPU coolers up to 170mm tall (when no fan is installed in the side panel)
- ATX PSUs up to 170mm deep when using the bottom fan location, when not using this fan location longer PSUs (up to 270mm deep) can be used
- Graphics cards up to 295mm in length with the top HDD cage installed
- With the top cage removed, graphics cards up to 430mm in length may be installed
- 26mm of space for cable routing behind the motherboard plate
- Thick rubber grommets on all holes on the motherboard plate
- Colours available: Black Pearl, Titanium Grey, Arctic White
- Case dimensions (WxHxD): 232 x 464 x 523mm
- Package dimensions (WxHxD): 320 x 535 x 610mm
- Net weight: 12,3 kg
See Define R4 home page for full details: HERE
The Unboxing
The R4 comes boxed with thick cardboard, styrofoam moudlings and the unit is wrapped in plastic. Our case was from PCCG and the box was free of damage. Fractal provide screws and a small user’s manual (which contains basic information and not a lot on the case features). A plastic sheith covers the front-door for protection (which will be removed after the build is complete) and Fractal provides two cooling fans which are mounted at the rear and the front grille on delivery.
What’s in the accessories box?:
- PSU Screws
- Mobo Standoffs
- Mobo screws
- SSD screws
- Thumb screws
- Rubber spacers
- Anti-vibration HDD screws
- 6x small cable ties
Whilst we didn’t use the cable ties we made good use of the rubber spacers!
The Power Supply: The Corsair TX-750
In Phil’s R3 Build, he used the Corsair HX-650; in the R4 we’re using the non-modular TX-750. The TX models are part of the Enthusiast series power supplies by Corsair and features an ultra-queiet 140mm double ball-bearing fan, over current/voltage/power protection, under voltage protection and short circuit protection for your rig. Corsair also have included high-quality “Japanese Capacitors” and the TX-750 is SLI ready.
Having all cables fixed to the PSU might be a concern for other cases, however having worked with the R3 before I knew we wouldn’t have an issue storing unused cables and the R4’s 26mm spacing will come in handy to hide all my cabling indiscretions. My previous rig (RIP) had a modular PSU, an Antec EarthWatts 750W, which was a godsend as the case didn’t have the cable management capabilities of the R4 and the TX-750 would’ve filled up the interiour.
Chassis Fans
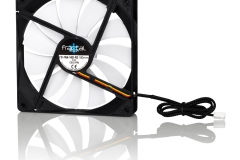
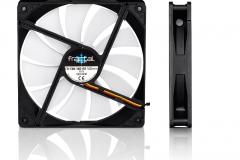
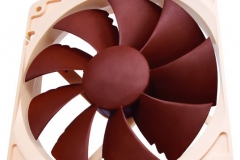
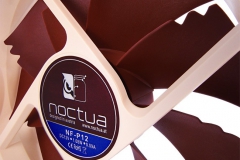
First things first, lets position and mount the chassis fans. We didn’t have many options in terms of fan stock lying around the place so we did what we could with what we had. The R4 comes with 2x Silent Series R2 140mm fans and together with the two Noctua 120mm we came up with, a good compromise in terms of airflow and balance was made.
Images Courtesy Fractal Design and Noctua respestively
We unbolted the first of the R2 fans (mounted at the rear) and replaced it with the P12: smaller fan yes, but the Noctua unit has better airflow than the R2’s (92.3m³/h @ 1300 RPM vs 66.0m³/h @ 1000 RPM normal speed) . The relocated rear R2 now lives up top at the front bay. The R4, like the R3 comes with two front fan bays – since we want as much air sucked into the case to be pulled through the HDD bays and through to the CPU cooling system we decided to mount the remaining P12 up top and the the second Fractal R2 stays in position. Fractal kindly supply a stack of rubber-gromets/spacers for noise reduction – we used them without hesitation to prevent vibration on the case from the fan housings. We used up the two Ultra-Low-Noise adapter cables that came with the NH-D14 on the two front fans for quiet operation.
The beige/chestnut colour of the Noctua’s don’t quite blend with the white of the Fractal R2’s however the grate door will hide the fact – its the quality of the P12’s we want and we’ll wear the look.
The Motherboard
Time to install the CPU and mount the Noctua cooler.
The Gigabyte GA-Z77X-UD3H is an extremely easy motherboard to work with and previous experience with Gigabyte motherboards we had no hesitation, in the price bracket, to go with the UD3H. We checked the processor to ensure no pin-bendage and mounted, carefully, the glorious i7 3770K. We took the time to ensure we lined up the CPU with the motherboard in the correct way – ie: lining up the notch on the package with the notch on the processor housing.
Next step, was to install the cooling mounts. Following the Noctua documentation carefully, we slid the back plate through the motherboard and screwed it down.
A trap for young players: the orientation of the back-plate is critical – be sure to install it the correct way or risk damage to your motherboard! And when you’re laying the mouting plates, be sure they match the orientation of the cooler itself as it sits ontop the processor.
After the cooling plate was installed, we inserted the Corsair Vengeance memory. Matching the right memory package with the motherboard and cooler combo is critical: Noctua document which motherboards are compatible with their coolers and what memory packages work with each cooler combination. In our case, we need the low-profile memory kit and the Corsair Vengeance 16GB DDR3 modules are great value for money and a nice balance between cost and performance. The blue casings of the modules match nicely with the Gigabyte motherboard heat sinks. Its all in the detail!
Normally, we’d install the fan after installing the motherboard, but for demonstration purposes we fitted the fan to the motherboard out of the case. Don’t forget the thermal paste – not too little, not too much.
As you can see, the cooler sits nicely ontop of the processor and has sufficient clearance from the memory modules.
When we did the R3 build, we found the NH-D14 had issues screwing down to the mobo mounting kit and we thought we installed it wrong; no such problem this time around – the Noctua installed perfectly and the screws wound down tight.
Installing the Motherboard
With the processor, cooler, and memory fitted – its time to install the motherboard and fix it to the case.
Fractal provide just enough brass standoffs for an ATX motherboard so don’t lose any. We learn’t from the R3 build to ensure all standoffs are installed before attempting to lay the board down. The motherboard I/O Shield slid into place without fuss – be sure to fix this into place before installing the motherboard otherwise you’ll spend wasted time unmounting the board.
What I love about the R4 is the amount of room inside the case – I have fairly large hands and I found getting around was easy and its confirmation of the R4 build quality that I never cut myself once: this is because there are zero sharp edges inside or outside the case.
Next steps routing and fitting the front panel connectors – always a fiddly excercise but the result is neat and worth the effort. The R4, like the R3 doesn’t come with a separate HDD LED on the front panel so we decided the most sensible thing to do was use the Power LED as the HDD LED. The blue-LED against black looks fantastic.
Installing the HDD’s & DVD-RW
The R4 comes with two separate hard drive bays. Because they are physically independant to each other you can remove them without having to remove all of your drives – the top cage is larger than the bottom. In our build, we only have 3 and a Pioneer DVD-RW drive so we opted to start at the top and work our way down. The spacing between drives encourages airflow and allows heat to escape to prevent your drives from heating up unncessarily.
The R4 allows different alignment of the HDD cages; or can be removed completely for additional airflow. We opted to leave them in as is. SSD’s can be mounted on the motherboard plate if required however we opted to our SSd in the top HDD cage.

Each 3.5″ drive bay is screwless and can be removed simply by pinching the enclosure arms together for easy removal. The 5.25″ bays are fixed to the case however, you simply slide in the device in and secure it with the supplied screws.
The 3.5″ bays have anti-vibration rubber pre-installed around the screw holes and you simply need to mount the drive, using the anti-vibration screws supplied, fix it down. Routing the SATA cables was a piece of cake and fitted nicely through the cable management. The result is neat.
Installing the PSU
Next up, the Corsair PSU. This was always going to be interesting as its not a moduler PSU – after the fit and routing the motherboard power, the CPU power, molex and the SATA cables behind the case the decision to buy the TX750 was now reinforced thanks to the cable management of the R4. We left two PCIe power connectors out for the graphics card which we later routed behind like the others.
Build Complete
Final steps where to install the GTX580. As you can see from the picture, the PCIe audio card is in the airflow path of the graphics card – so we removed it. For this build, we can live with the onboard VIA audio as most of our audio is via USB headphones.
During fitting, we noticed the motherboard power cable was poking through the wrong hole so we relocated it up one which allowed more clearance for the 580 and allowed the SATA cables to be a little more free. The front-panel USB3 block fits nicely between the Noctua fan and the 580. As you can see, the 580 has still plenty of space – especially at the HDD cage end where its miles off. A larger card in the future would not have an issue slotting in.
We routed the PCIe cables for the graphics card behind the motherboard plate and poked them through between the plate and HDD enclosure. Fortunately, the R4 is forgiving with mistakes the routing was a easy and a no-brainer to complete.
Hidden Cabling
As you can from the pictures, all PSU cabling, front-panel and SATA leads reside hidden behind the motherboard plate.
I’m personally not a fan of zipties as they’re more of a pain than anything else and I prefer velcro tape – the result: a flat and tidy bunch of cables! Not that it matters as its all hidden.
Case Vibration
During the R3 build, we noticed fan vibration eminating from the front. The R4 suffers from the same affliction – the problem isn’t the fan housing vibrating against the bay but rather the front grille vibrating against the case itself which is caused by the fan rotation. The vibration disappears when the grille is in the down position and fortunately its an intermittent issue and is easily resolved with rubber stoppers and loosening off the fan screws to allow the rubber stoppers more clearance to work their magic.
By not completely tightening all chassis and front-bay fans I was able to eliminate the vibration noises.
Thermal Testing
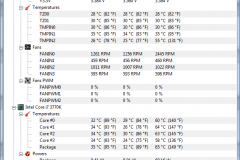
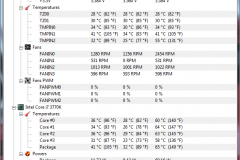
With the i7 on stock settings, we fired up PRIME95 for around 20 minutes to see what the processor and ambient temperate of the board heated up to. We used CPUID Hardware Monitor to tell us what those temperatures were.
Processor idle temps sit around 32 degrees for the package and 24 degress on the coolest core. After 20 minutes, the processor barely breaks a sweat with the Noctua on its back and doesn’t land over 65 degrees with the lowest core at 57 degrees! Awesome stuff. Don’t forget people, the front panel is closed on the R4 and the air is being sucked through the front side vents and warm air ejected at the rear and top thanks to the chassis fans.
After smashing the CPU, we fired up Unigen (Heaven Benchmark 4.0) to tear the GPU a new one. The 580 being tested is the Gigabyte Windforce edition which provides improved cooling versus the stock model via a triple-fan setup. We ran a 26-scene benchmark with everything turned on at 1920×1200 – the GPU never got over 71 degrees and idles happily at 35 degrees after testing. (Its worth noting the GPU sat around 68 degrees until scene 20 where it started to get a little warmer and finally settling in at 71.)
Closing Thoughts
Overall, the R4 is a class act – the build quality and finish of the case is outstanding. The case vibration we experienced is a slight on the otherwise excellent performance.
The quiet operation we’re enjoying is impressive considering there are 6 fans operating inside and the insulation on the top and sides perform well. Even with the front-door closed, the CPU and GPU remain cool under load and noise levels where never noticable during thermal testing. This is thanks to the R4’s excellent noise reduction capabilities due to the dense-bitumen material used on the side panels. Like the R3, the R4 noise levels are to be commended.
There is absolutely no hint of buyer’s remorse on the R4 and coupled with the hardware bolted inside – the unit is a clean, minimalist machine worthy of a positive review. Kudos Fractal Design, the R4 is a clear winner in terms of quality, noise reduction, features and clever practical design.

